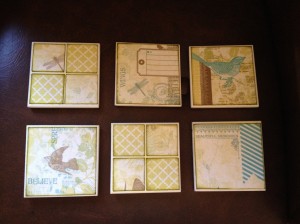
These gorgeous coasters were lots of fun and so easy to make. Here’s what you need:
* tiles (4 or 6 10cm x 10cm). I used white tiles from Bunnings but there were other colours – black, maroon, cream.
* paintbush
* pencil
* scrapbooking papers – I used the delightful Skylark range from “Close to my Heart”. A friend of mine used beautiful quotes from an old calendar. You could also use photos, wrapping paper, pictures from cards.
* Mod Podge (type of glue – I bought mine from a scrapbooking shop)
* scissors/paper cutter
* Water -resistant, clear acrylic spray (I used hairspray)
* sticky felt squares (the ones you put on furniture legs so your floor doesn’t get scratched)
I decided to make six coasters. I cut my paper squares out slightly smaller than the tile to leave a thin border. If you don’t want a border, trace around your tile onto the paper. With two of the squares, I cut them into quarters for a different effect. You could also cut your squares into strips or triangles. Get creative as you like, cutting out different patterns and gluing them onto your tile. I inked around the edges of my squares with green ink. When I brushed the Mod Podge over the top, the ink smeared a little but this gave it a nice effect.
You could use papers that match in with your living room decor or favourite coffee mugs! I love the blues and greens in these papers.
Once all your squares of paper are cut out, paint a tile with Mod Podge. Carefully place your square piece of paper over the top and press down evenly and gently, pressing out any air bubbles. You’ve only got a few seconds to move the paper around and straighten it up on the tile before it is stuck there for good. Wait a couple of minutes for the paper to stick and then paint a layer of Mod Podge over the top and leave to the side. Continue with the next tile until all your tiles are covered.
Let the tiles dry for 15-20 minutes, the apply another coat of Mod Podge on top. Let them dry and then do a third coat. When they have fully dried, spray with the clear acrylic (hairspray) to seal it all. When dry, turn over and stick a felt square in the corner of each tile. Now they’re ready for your glass of wine or cup of coffee!
I found a little wooden stand to put them on and used some strips of leftover paper and quotes to decorate the stand. I Mod Podged over the top to protect the paper and give it a shiny look.
I used them at our last Book Club meeting. What do you think?


I love this idea 🙂
LikeLike